Create and edit a Project
In iCombine, you can initiate every project and insert all important information, such as standard and custom project attributes. This is the preparation for the following project team staffing.
Please note that a project must always be created by a workspace admin. If you are a workspace admin and want to delegate project management tasks, please staff a member to the respective project and assign project management permissions to that member.
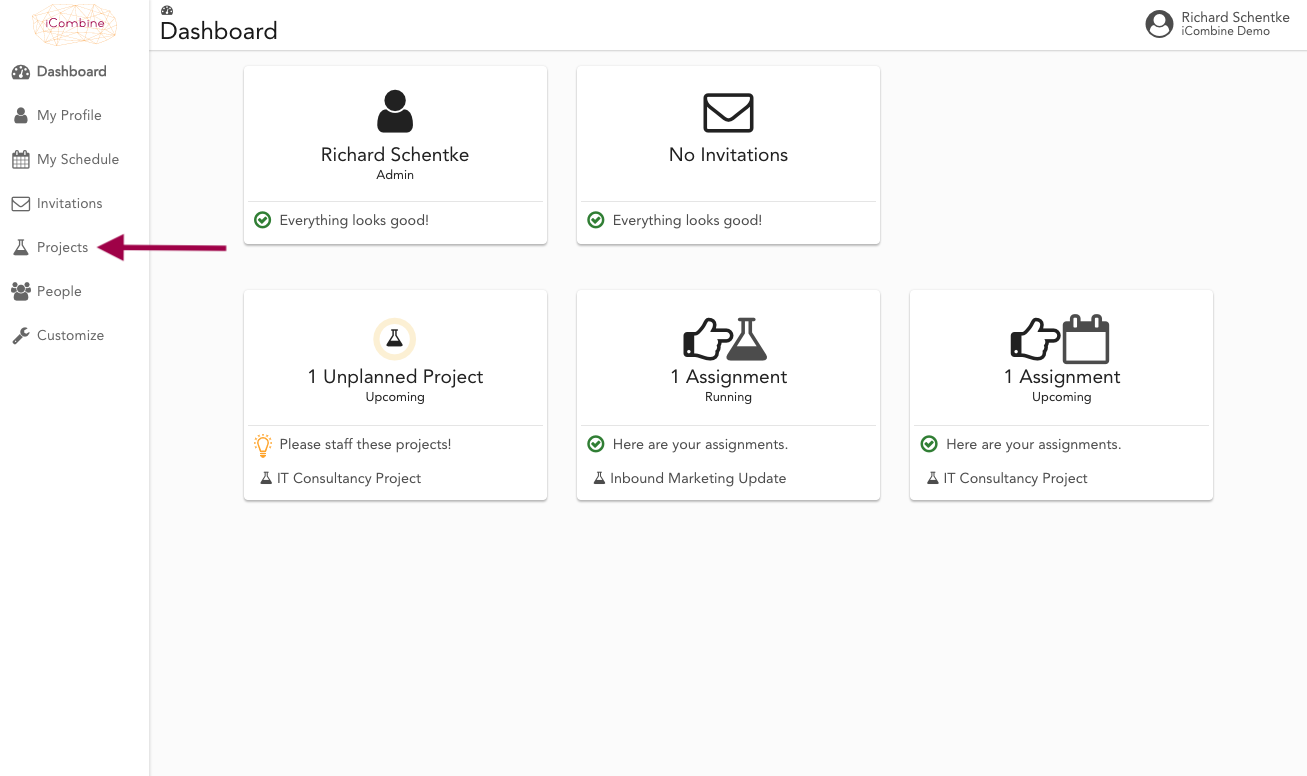
1. Go to the Project Overview
After logging in to iCombine, you will always start your journey on your personal dashboard. To get to the project overview, click on Projects.
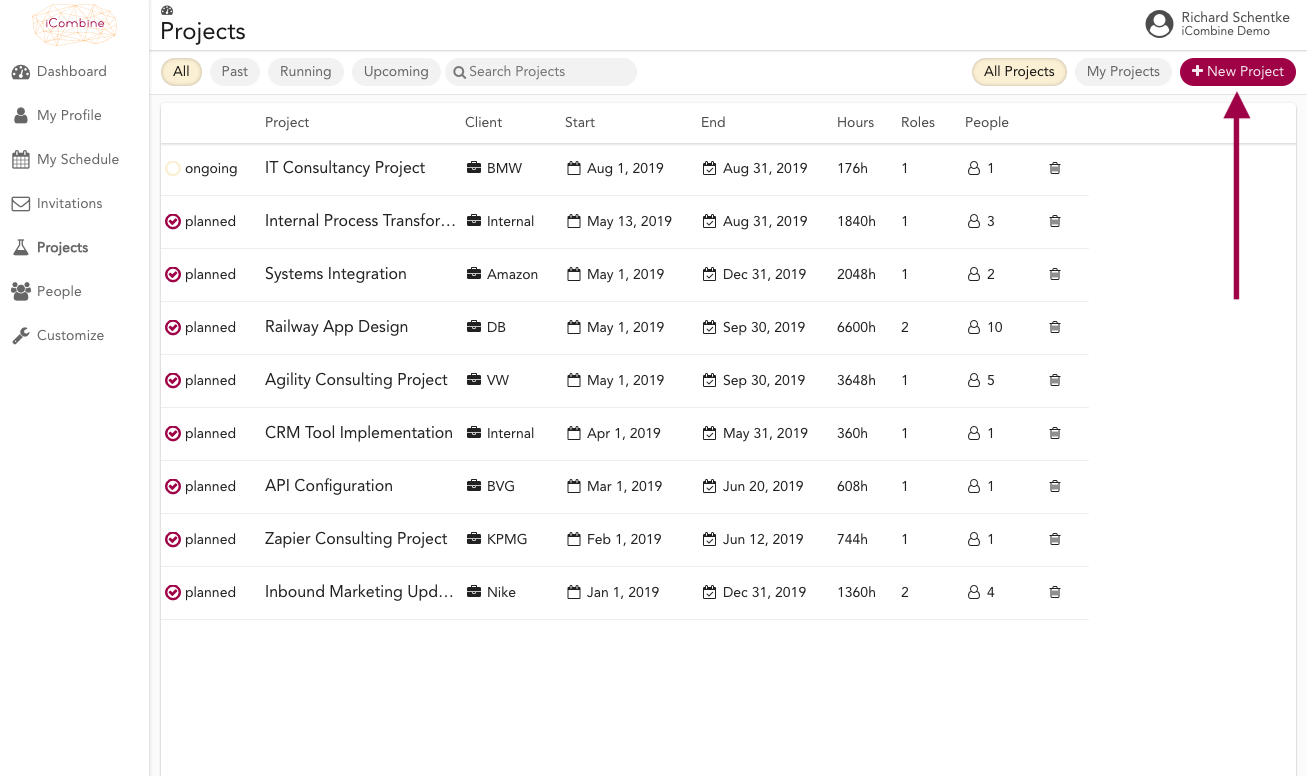
2. Start a new Project
In the overview, you see all projects in your workspace that you manage or that you are assigned to.
To start a new project, click + New Project.
3. Enter Standard Project Attributes
Now assign a project name and client. Here you can create a new client, or select an existing client from a list as soon as you enter the first letters.
On the right side, select the start and end dates.
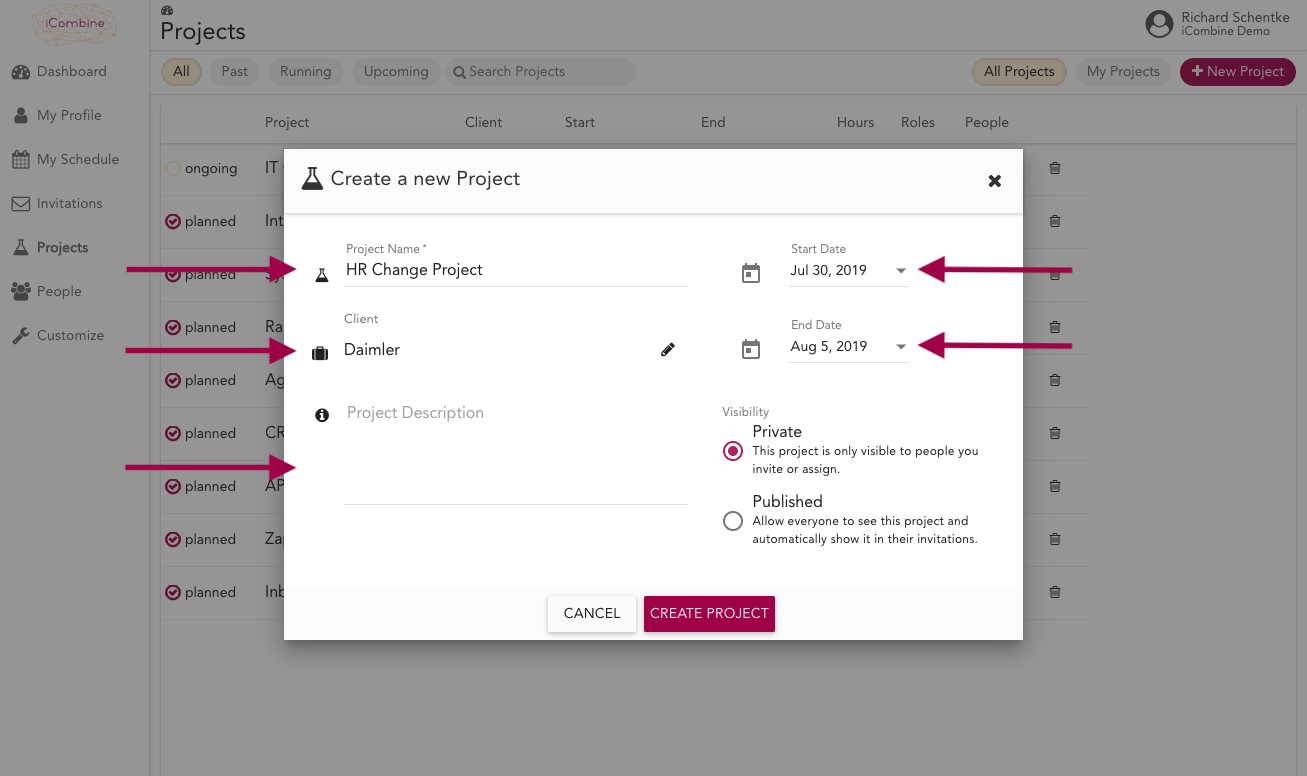
4. Choose between Private and Public Project
Here, you determine which experts are allowed to see this project and the project roles.
Private projects can only be seen by experts who are actively invited or directly assigned to a project role by you or a project planner.
Published projects can be seen by all experts, they are automatically invited to express their interest in the project roles. Finally, click Create Project.

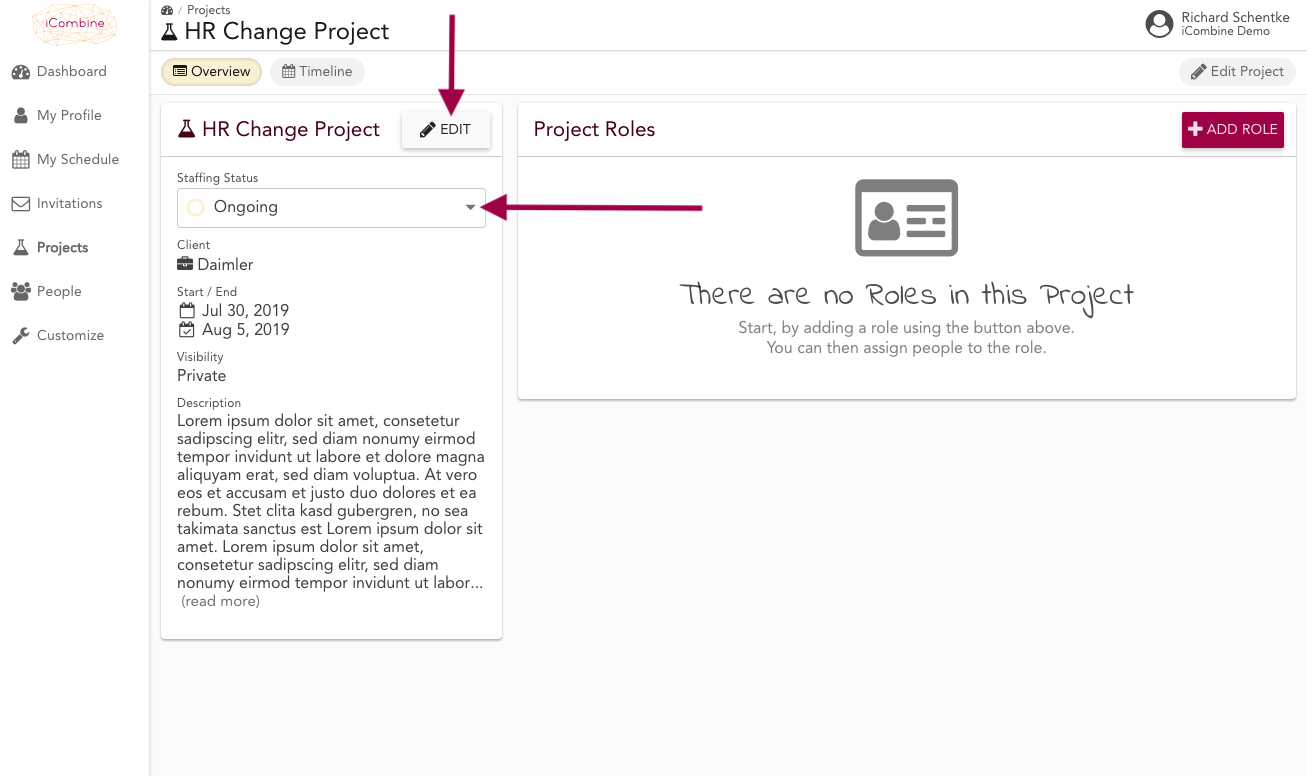
5. Enter Custom Project Attributes
In the details of each project, you can see the custom attributes under the project description. Click directly in the input field and make an entry for the attribute.
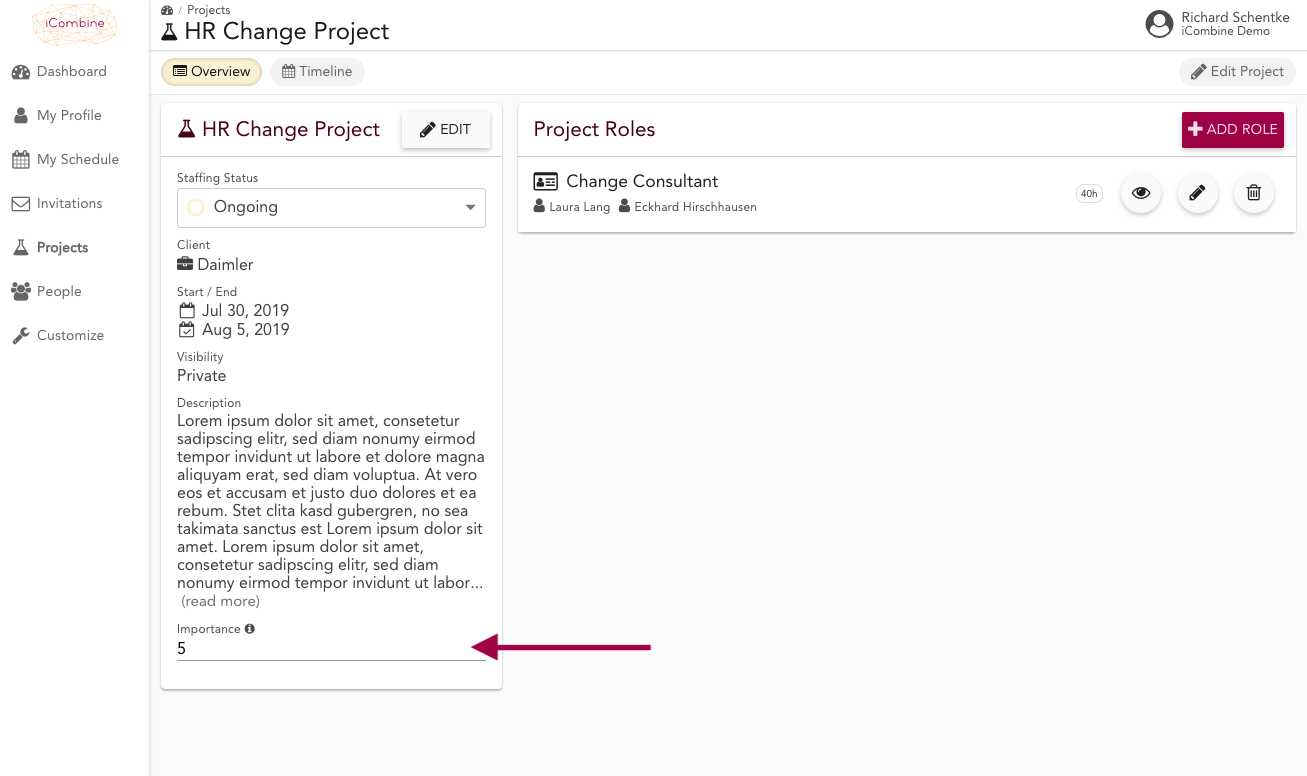
6. Change Project Attributes or the Staffing Status
You can change the project details any time by clicking on Edit. To adjust the Staffing Status, simply click in the field.