Project Member Permissions
iCombine allows you to collaborate with your experts by assigning project permission. Thus, you can share project planning tasks by allowing others to book times, select team members or change details in a certain project. Please note that permissions have to bet set in each project individually.
1. See the Permissions of a Project Member
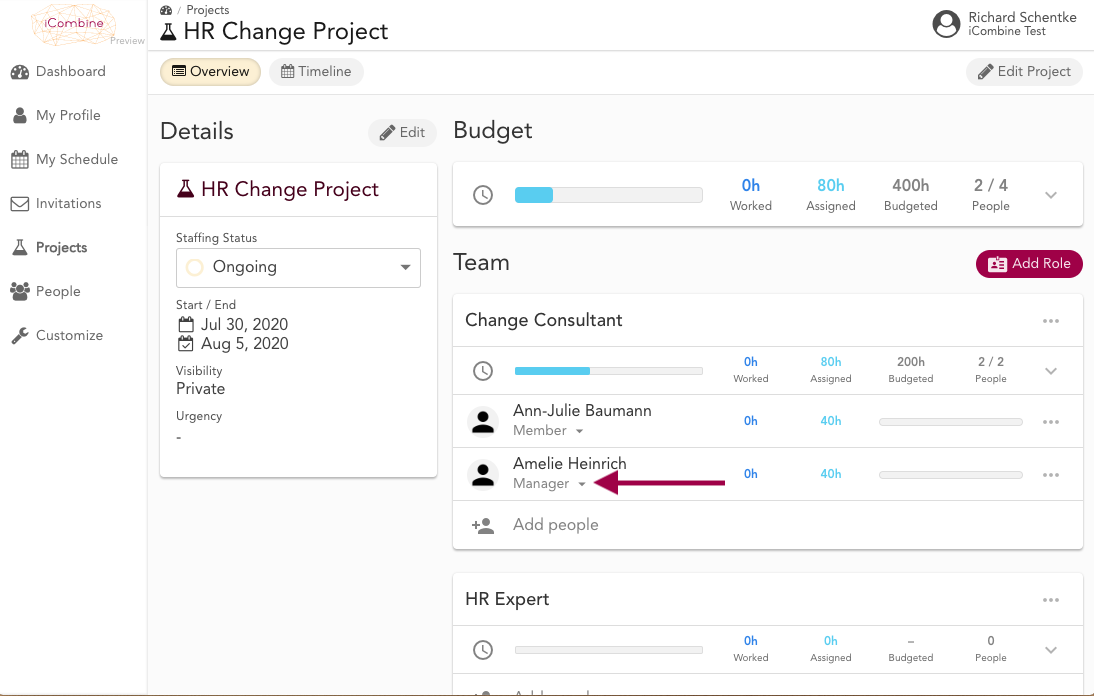
Go to Projects and click on a project name. In the following project details screen, you see all people that have already been added to the project team. Under each experts’ name, you see the current permissions.
By clicking on Member (default), you can change the permission of an expert.
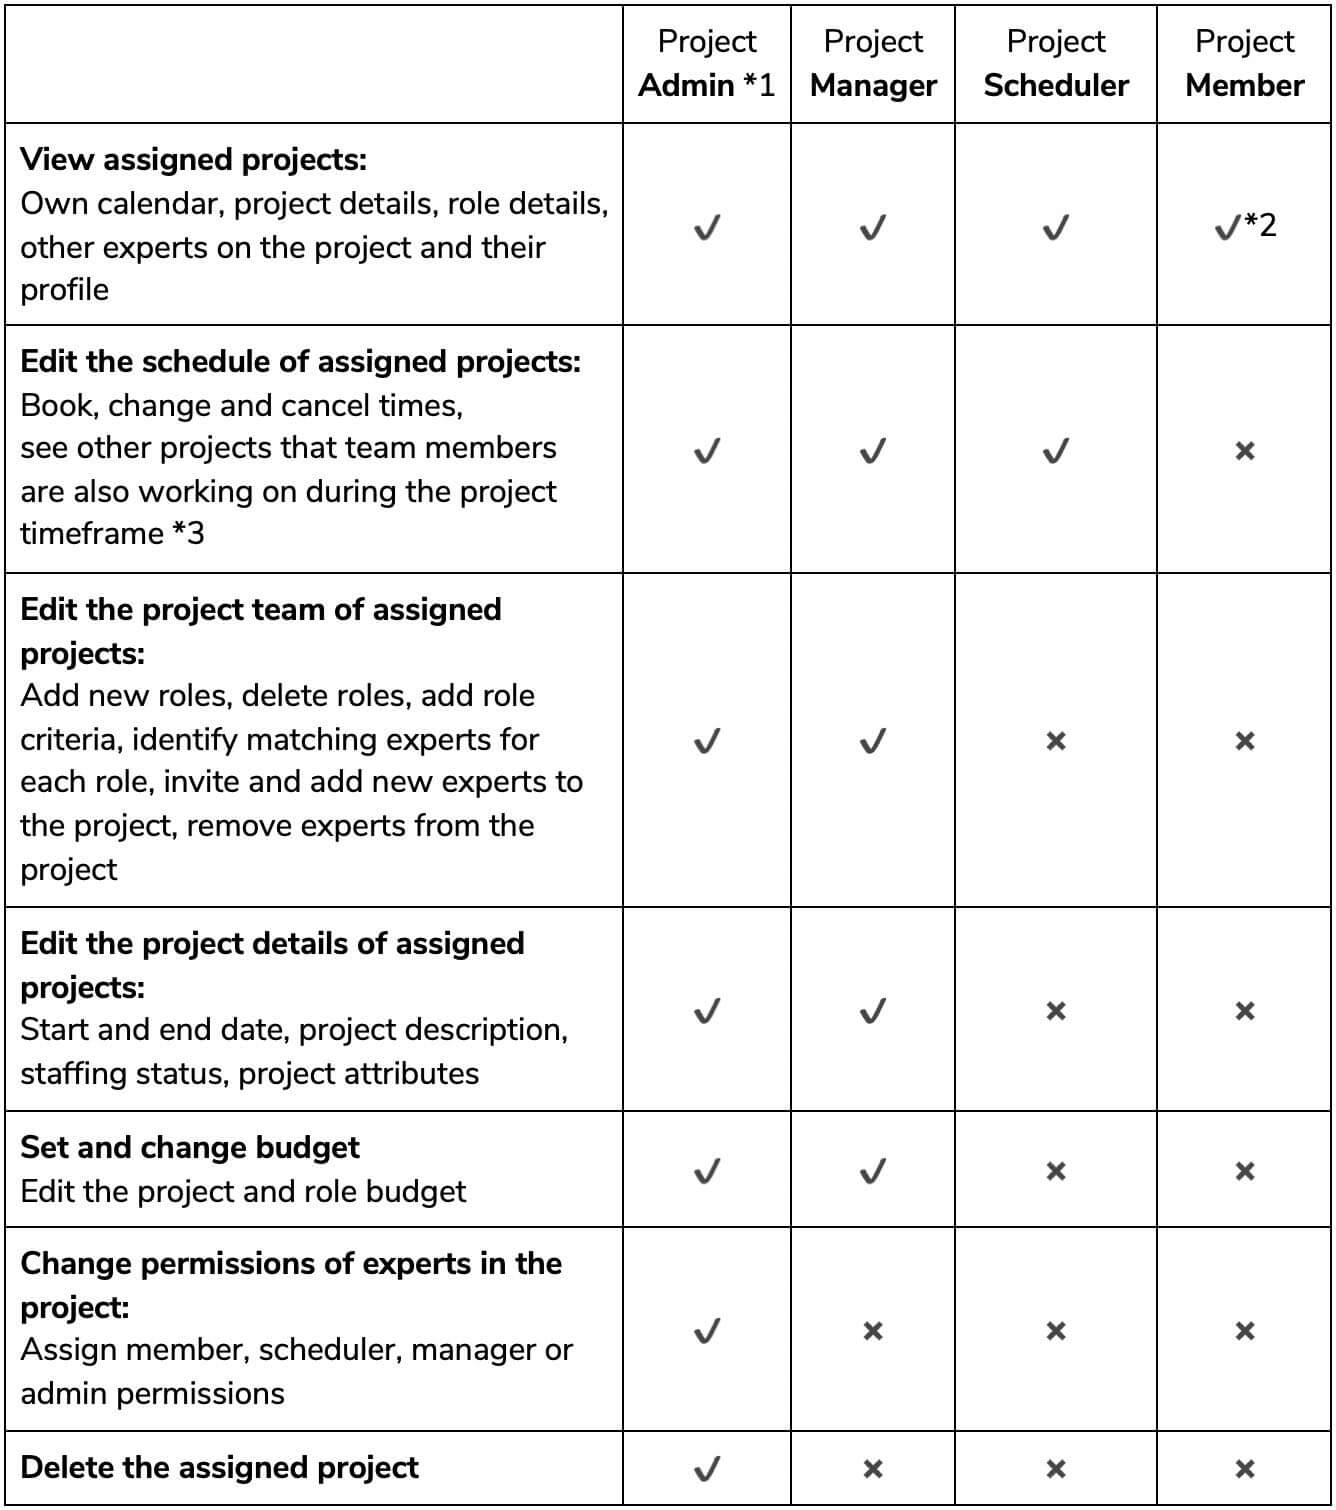
Have a look at this table to see the differences between the available access roles for projects.
Please note that:
*1 Users that were granted “Workspace Admin” permission are able to edit projects like a project admin.
*2 Project members don’t see full competency profiles of their team members. They only see the relevant match criteria between each expert and their assigned role.
*3 Future and past projects of other team members are anonymized for people without admin permissions.
2. Assign a new Permission to a Project Member
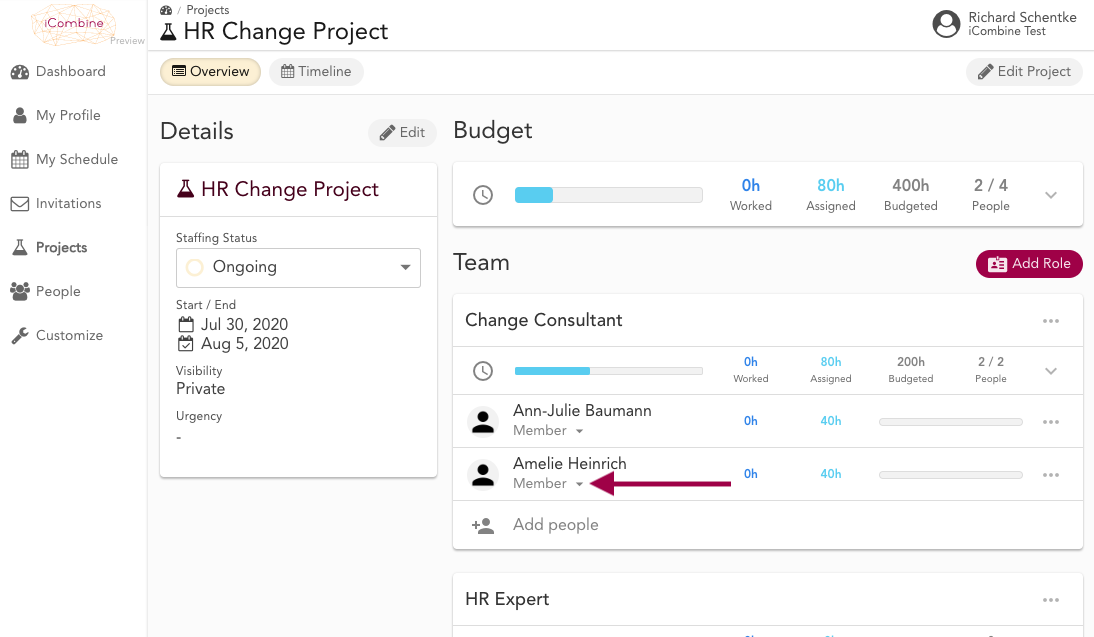
After clicking on Member under an experts’ name, you can choose a new permission that you want to assign to the expert.

3. View the updated Permission of a Project Member
View the assigned permission under the name of each team member. You can change the permissions at any time.