Onboarding of Members and Managers
In the first step, you have already created a profile catalog for your organization and defined custom attributes. Now you can invite your employees, freelancers and other experts to your iCombine Workspace in just a few steps. The goal is to make all competencies, experiences, interests and weekly working hours of each expert visible in a structured way. On this basis, you can optimally plan your projects and teams in the future. In addition, you will learn how to edit the profiles of your experts as an admin, assign admin rights or manager permissions to others, and delete users from your workspace.
1. Invite your Experts
Log-in now via https://my.icombine.net. In case you have not registered yet, please use the specific join-link we sent to you in advance.
1.1 Navigate to People
As admin, click on People. In the future, you will get an overview of all experts in your organization right here. In the Timeline, you can see the availability of all experts.

1.2 Invite Everybody by Sending a Link
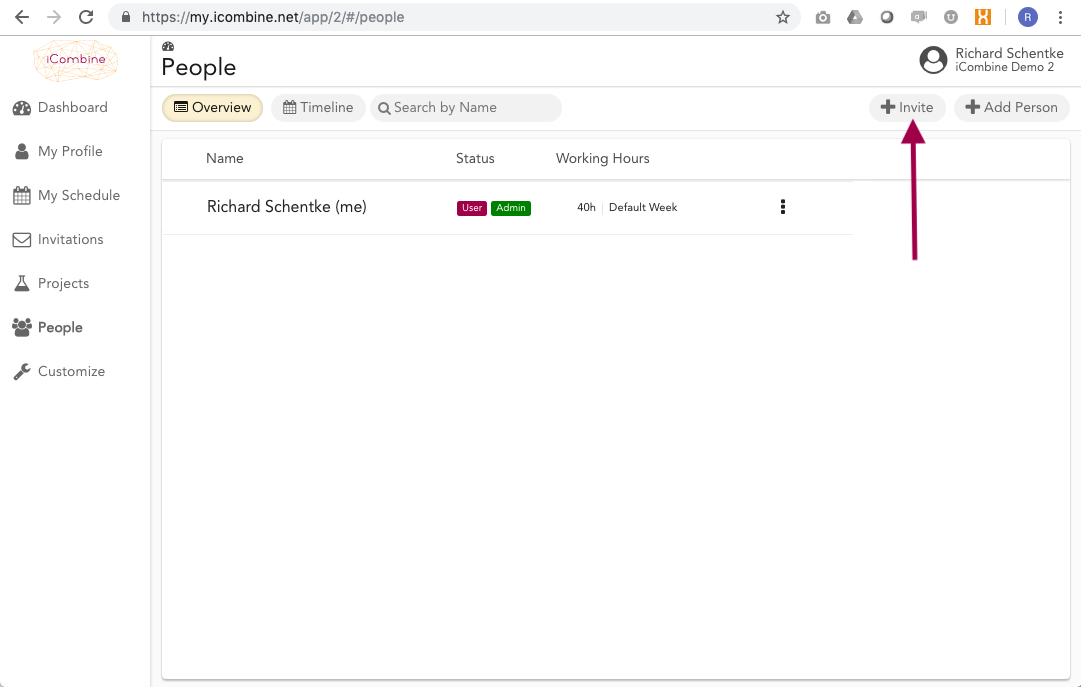
Click + Invite in the upper right to open a pop-up window.
You can copy the link listed there and send it to your experts, for example by email or via any other communication tool. Everyone using this link does not have admin rights in your organization. You can, however, grant admin rights once the person has logged in.

1.3 Invite Single Experts by Using the iCombine Mail System
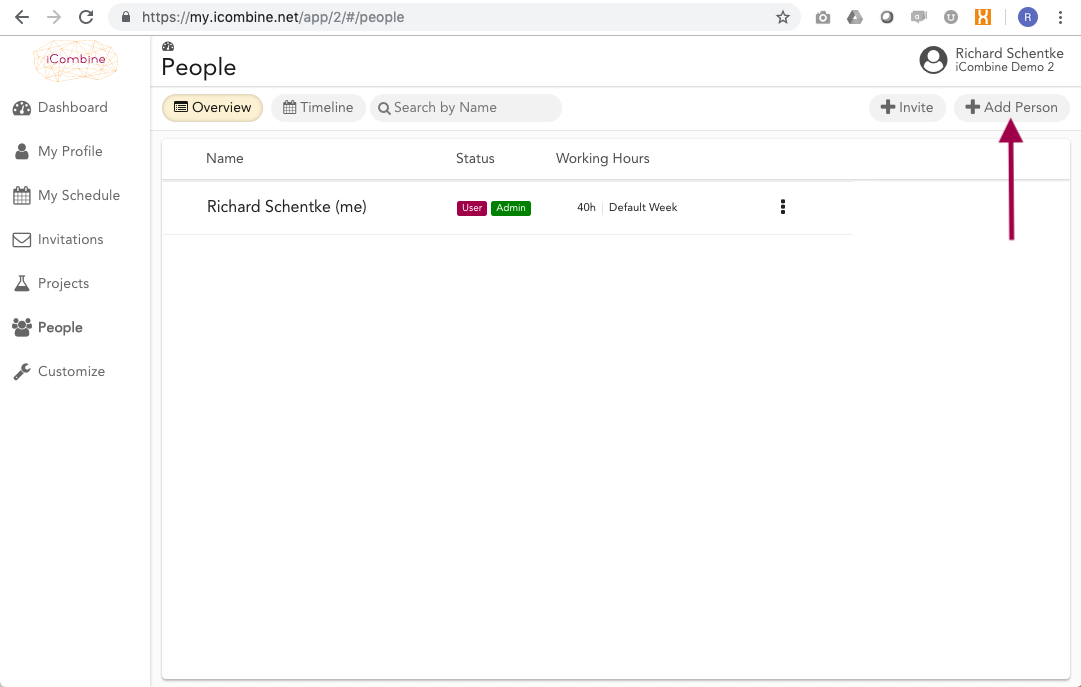
Click + Add Person in the top right corner.
Here you have the opportunity to invite individual experts by name and email. These people will then receive a direct invitation from our iCombine mailing system with the appropriate link to your workspace.
1.4 Create Placeholder Profiles
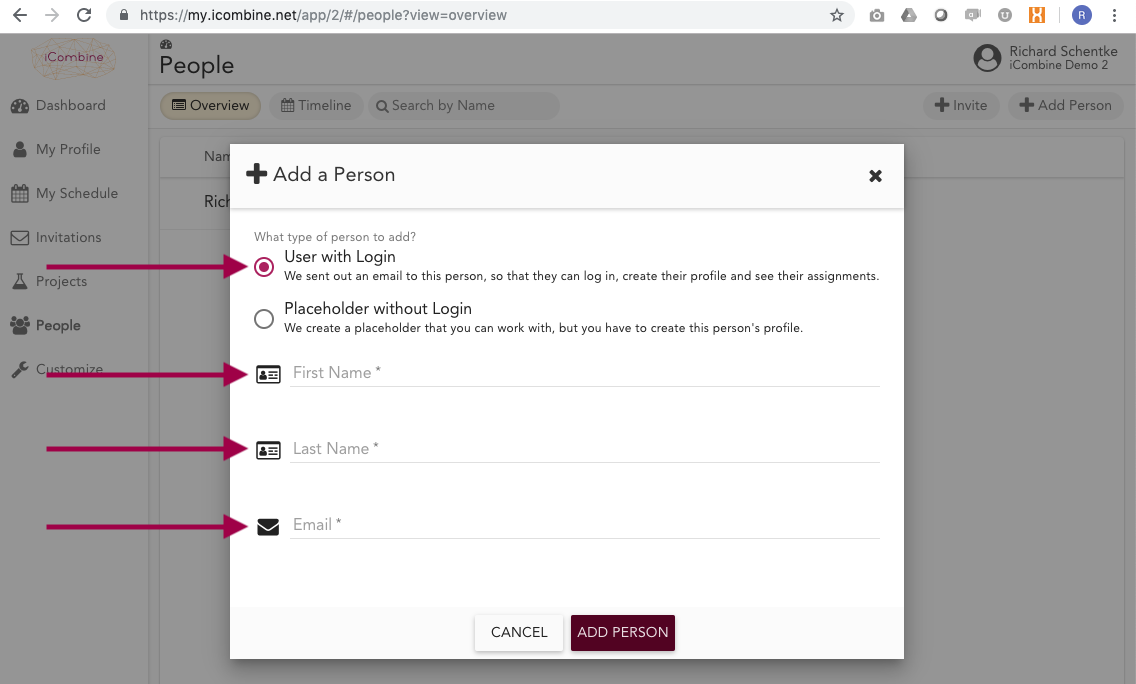
You can also create profiles for experts who do not have active access to iCombine themselves. In this case, select Placeholder without Login. As an admin, you can then create competence profiles for these experts and staff them just like experts with an own login.
Please keep in mind that placeholders do not receive information from the iCombine system since their email address is not in the system.

2. Define Weekly Working Hours
2.1 Choose an Expert
Once the first experts have logged into your workspace, you can define weekly working hours for each person. Click directly on the weekly working hours of an expert in the people list (if you hover over this field, it will stand out).

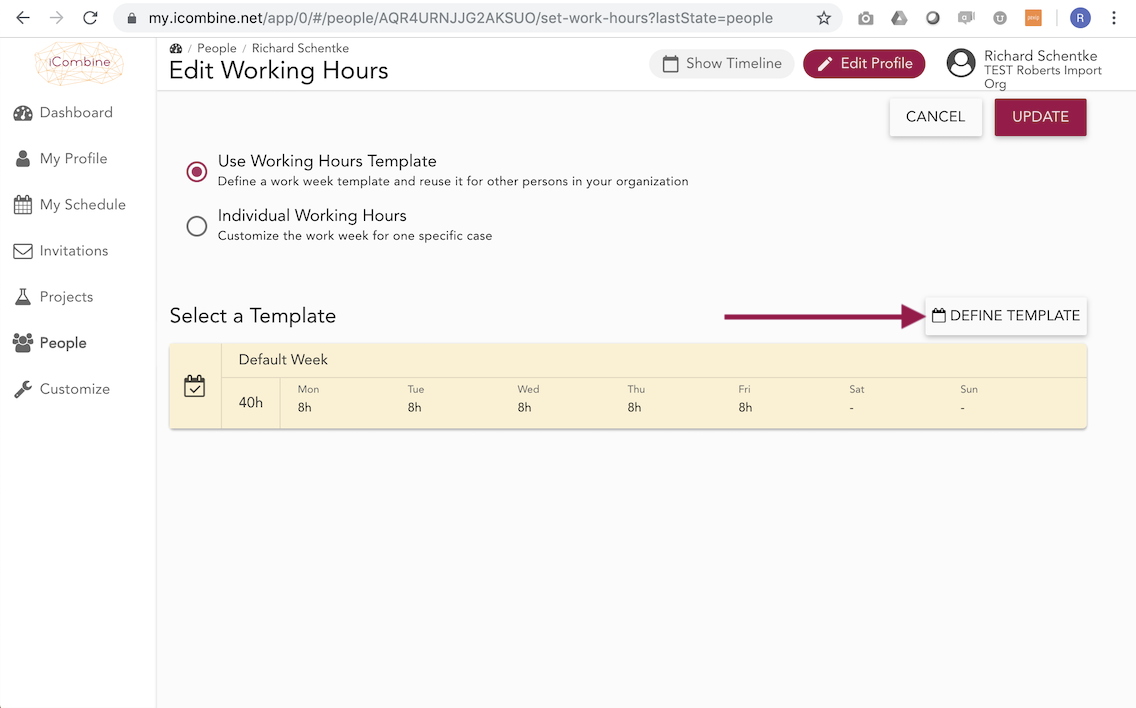
2.2 Define a new Working Hours Template
By default, we already have the 40-hour week as a template. You now have the option of defining additional templates. Click Define Template. Later you can also assign the templates to other employees.
2.3 Set Daily Working Hours of the new Template
Enter a name for the new template in the pop-up window and set the working time per day of the week. Finally, choose Create Template.
In case you define a template with zero working hours per week, booking hours in the schedule of this expert will automatically be disabled.

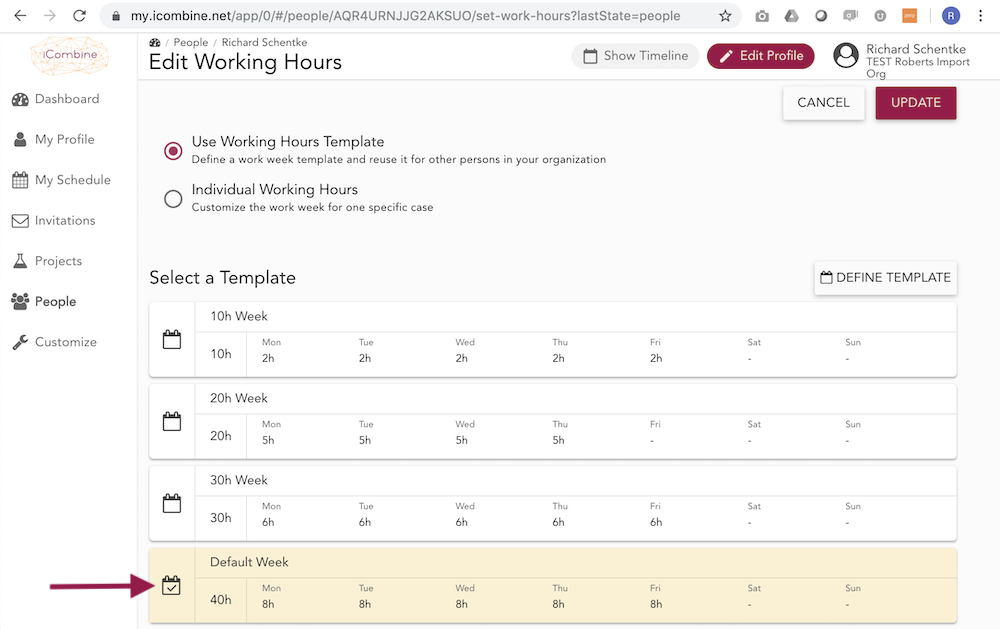
2.4 Select a Template for an Expert
From the templates that you create, you can now select a suitable weekly working time. The selected one is then highlighted. Finally, click on Update.
Now you get back to the list of experts. Click directly on the weekly working hours of other experts to change them.
3. Edit Competency Profiles of your Experts or Placeholders
As an admin, you have the right to edit the self-assessment of your experts and the resulting competence profiles. For placeholder profiles, you completely set up competency profile yourself, since in this case the expert herself does not have access to iCombine.
3.1 Choose an Expert
Click on an expert from the list in the people view or pool section.

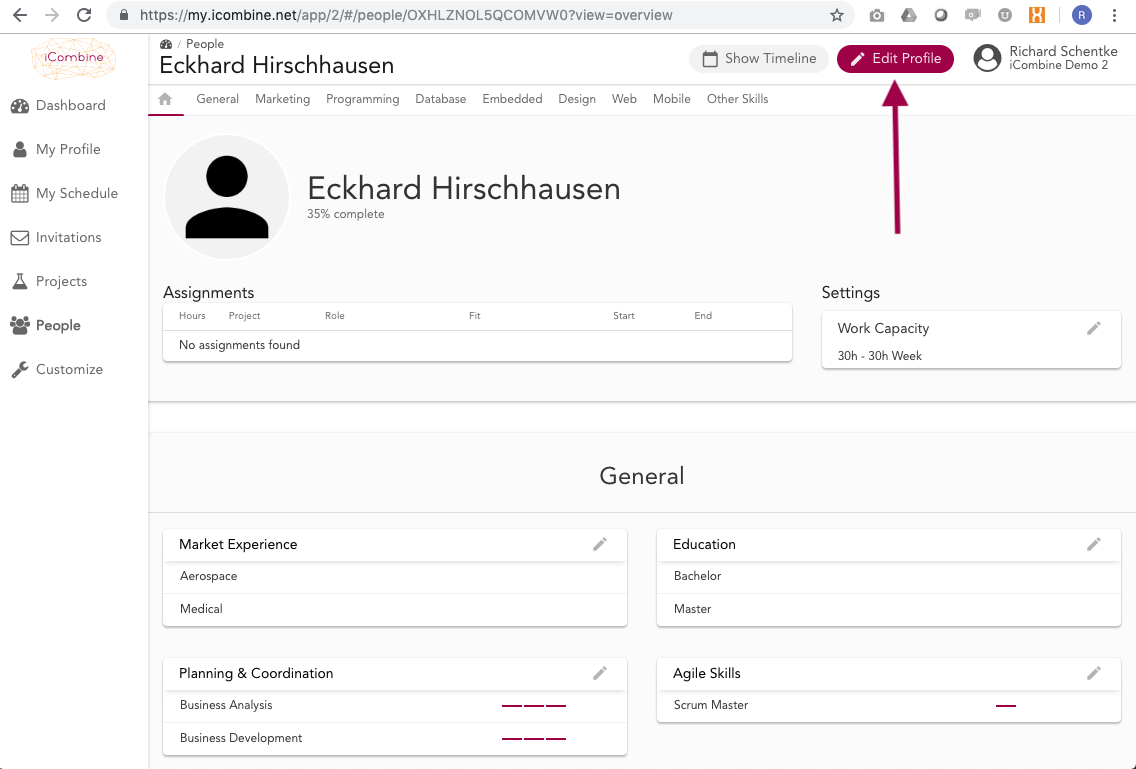
3.2 Go to the Editor in the Expert Profile
You will now see an empty profile or the skills, interests and experiences selected by the expert. Click Edit Profile in the upper right corner to create or edit the profile.
3.3 Edit the Expert Profile
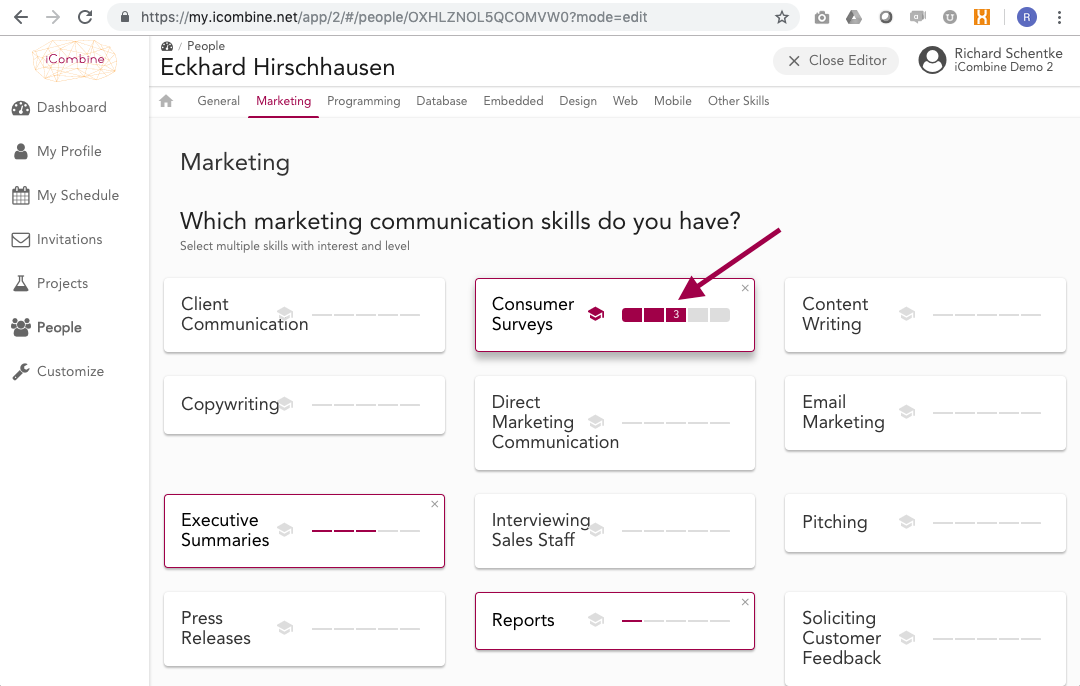
Start selecting criteria from the predefined interview. Everything you see here is based on the profile catalog that was created for your organization.
For some questions, you have the opportunity to rate people skills on a level of 1-5. Move your mouse over the bars and click the appropriate level.
Recommendation: Each Skill Level means something different. Read the guide to learn more about each individual level.
3.4 Work with Improvement Wishes
The selected hat next to a skill means that the person in this area wants to develop and wished to increase own knowledge.
Once you’re done, click Close Editor.

4. Appointment of Admins
4.1 Check the Status of each Expert
In the people view, you can always see the status of each expert, including the assigned permissions.

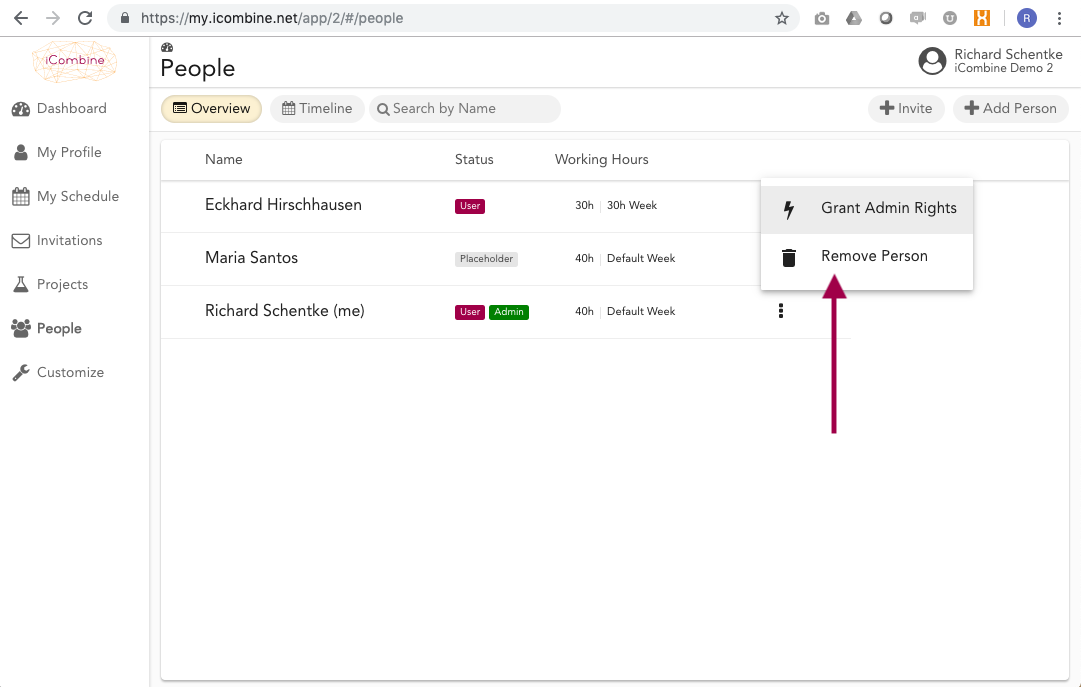
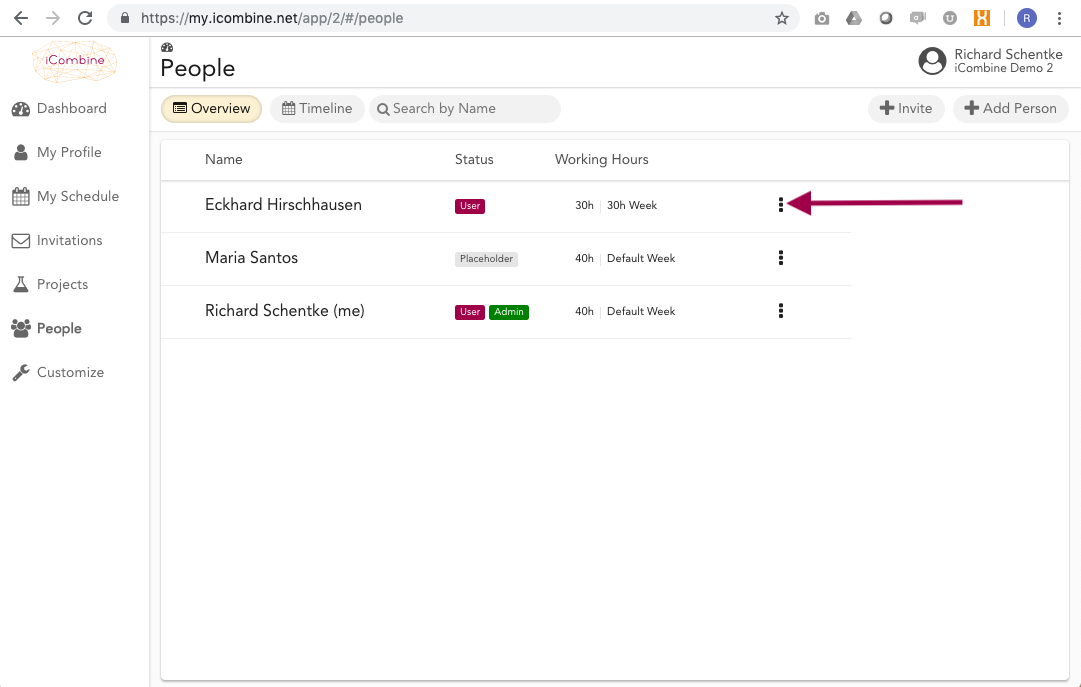
4.2 Choose an Expert
Click the right menu icon in a expert’s row.
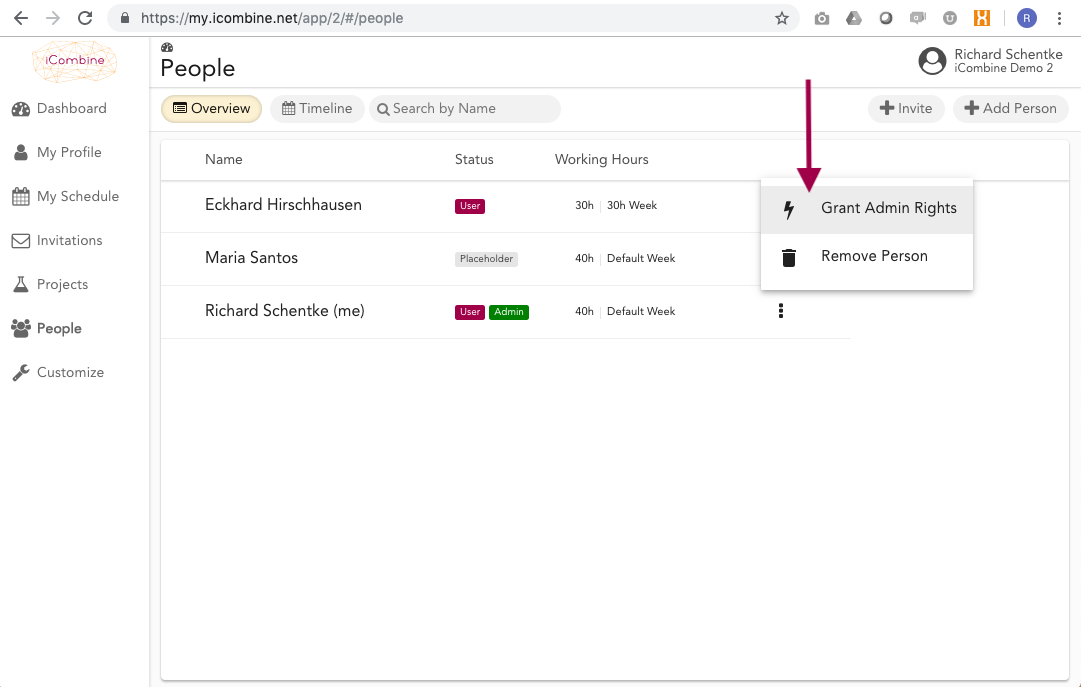
4.3 Grant Admin Rights to an Expert
You can turn a user into an admin by clicking on Grant Admin Rights.
5. Appointment of Managers
As a workspace admin, you automatically have full access to all projects, people and pools.
Workspace admins are responsible for the initial creation of each new project or pool.
If you want to delegate management tasks within a project or pools, such as staffing team members to project roles or editing expert profiles within a pool, you may grant project manager or pool manager rights to normal workspace members.
To learn more, please refer to the manager guide.
6. Removal of Users
6.1 Choose an Expert
Click the right menu icon in a expert’s row.
6.2 Remove an Expert
You can remove the user from your workspace by clicking on Remove Person.