Customize Project Attributes
Besides standard information about your projects like name, client, description, and headcount, you can add your own, custom project attributes to keep relevant information for your planning at hand. These custom attributes will appear in the project overview, in the detail view of each project and in the project export.
1. Add Custom Project Attributes to your Workspace
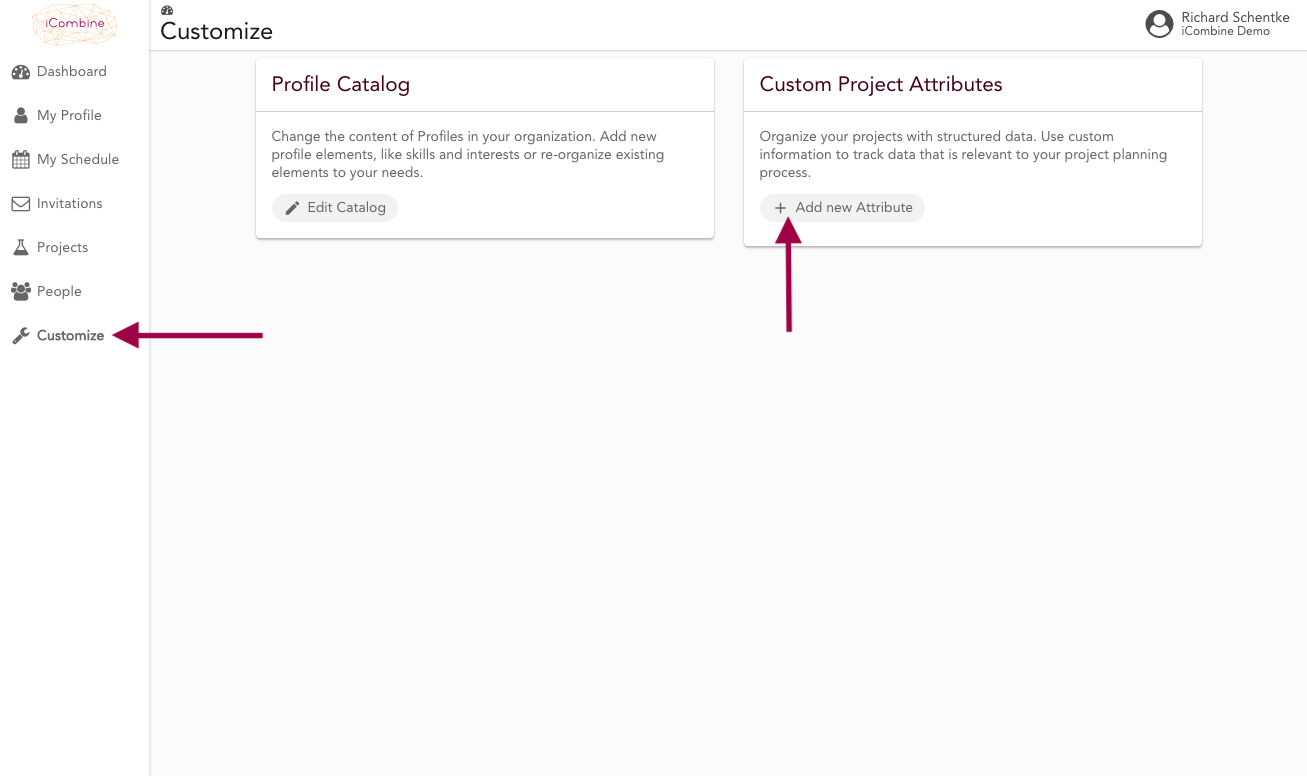
1.1 Go to Custom Project Attributes
Choose Customize from the menu. Then click on + Add new Attribute.
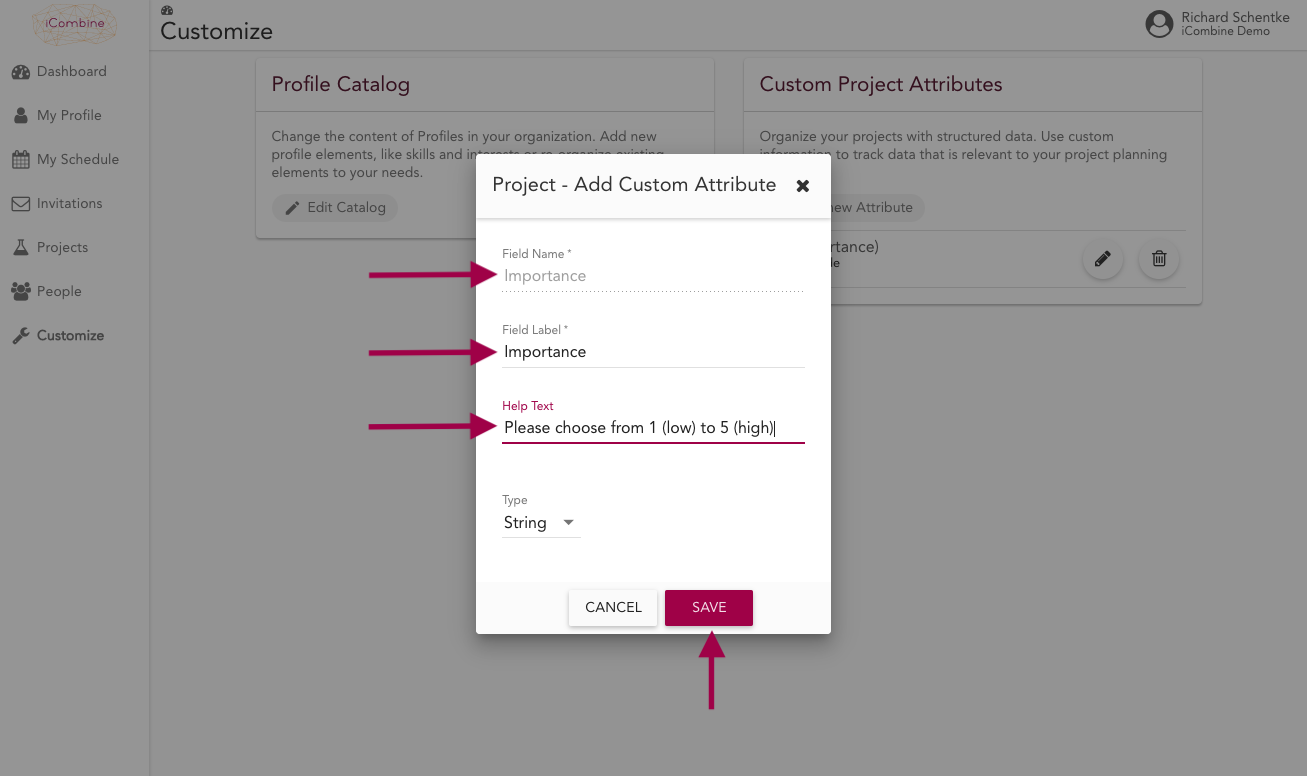
1.2 Give a Name to the new Attribute
Give your attribute a name and a label. You will only see the label in the project overview and in project details. Then, formulate a text that describes the attribute or the desired input. Finally, click Save.
2. View and Edit Custom Project Attributes
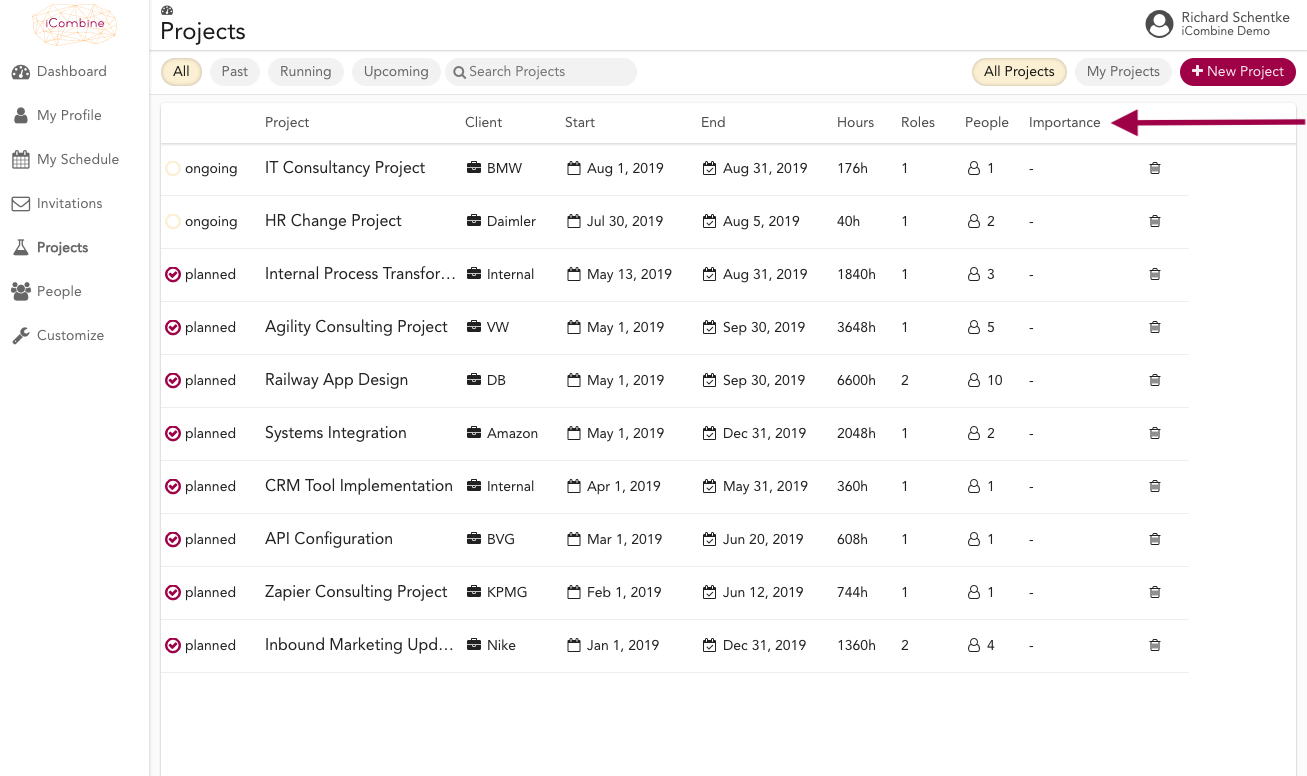
2.1 See the Attribute in your Projects Overview
Every custom attribute will appear in the projects overview as a separate column. Also, you will find your custom attributes in the project excel download.
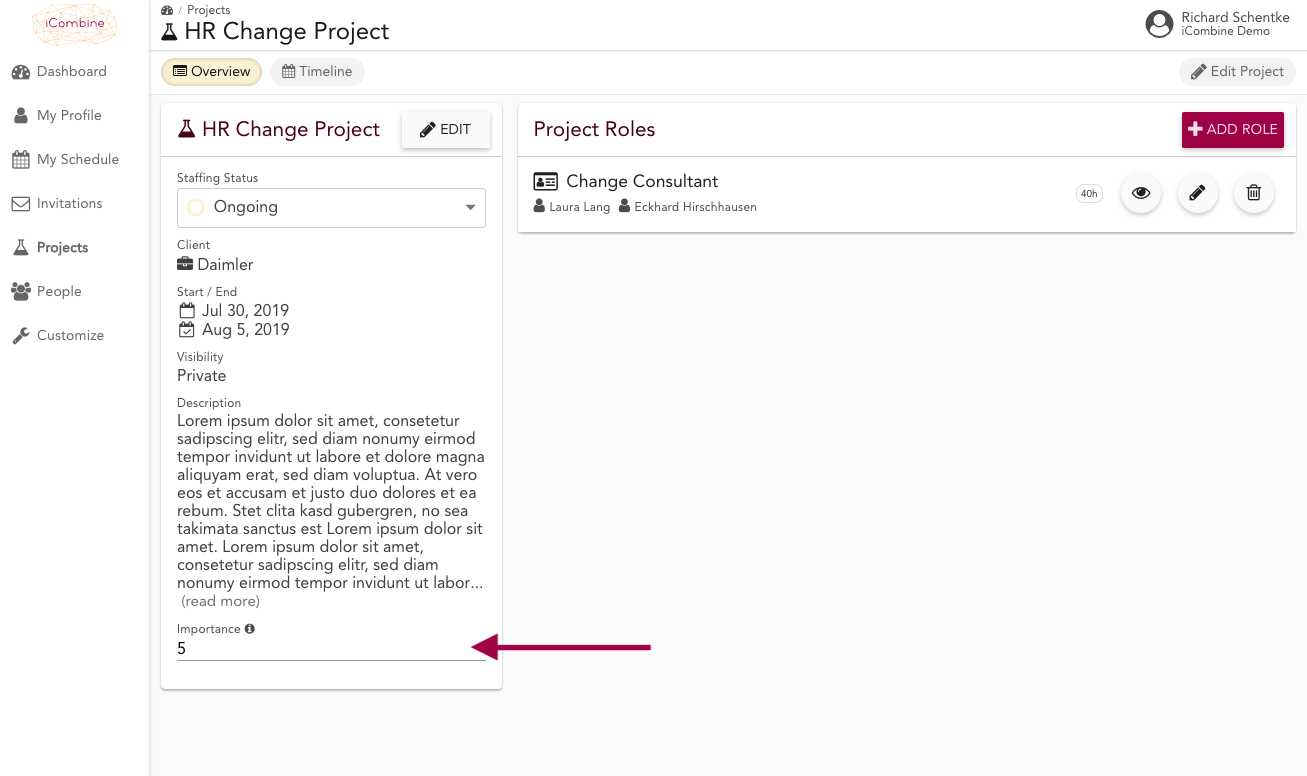
2.2 Update a Custom Attribute in a Project
In the details of a project, you can see your custom attributes under the project description. Click directly in the input field and make an entry for the attribute.